Monday, October 29, 2012

Never never!


Never, never, never stop dreaming.

Every now and again, it's good to have a reminder.
Dreaming is important.
Day dreaming is what brings us (humanity) forward; out of the caves and into the sky scrapers.
Night dreaming is where we solve problems, repair ourselves, and communicate with the unknown*.

I want my all children to live in a world where their dreaming life is as important as their pay-attention-and-learn-to-do-left-brain-stuff life. 

As we journey towards the darkest part of the year, we'll be talking a lot about dreams and dreaming.

Side note: the Pan Dulce was AMAZING. I was too busy eating to get a final photo, but YUM.

* Some call it the subconscious, some call it the spirit world. I think both names are equally valid descriptions of that shadowy place.

Friday, October 26, 2012

Photo Friday

Bread dough on the rise! I'm trying my hand at the Pan Dulce recipe over at Joythebaker.com
I'll let you know how it turns out.
My kitchen is freezing, so I fear that it will take forever for the dough to rise.

Wednesday, October 24, 2012

Skull Madness: Sugar Skull tutorial


Hola hola, mis amigos! I love skulls--and as I tell my kids: they aren't scary, they're necessary or we'd all have heads like jellyfish. I also love bright colors and patterns, so naturally sugar skulls appeal to me on a fundamental level. Like when you were six and would geek out over My Little Ponies or GI Joe.

I have thus far come up with two variations on polymer clay sugar skulls, but give me time and I'm sure I'll make more. ARE YOU READY TO GET CRAFTY?

Supplies, for Sugar Skulls two ways:

Polymer Clay--I used Sculpey Brand Premo clay--white and one other color of your choice.
A cutting tool
A needle tool (or a needle and a pencil)
Jump rings (10mm size)
Pin backs
Acrylic Paint (black,plus 3 colors of your choice)
Paint brush--small round (like a 2 or 3)
Fine tipped permanent pen in black
Rubber stamp with floral pattern
Oval clay cutter (like a cookie cutter but smaller)


First you'll need just your clay, cutting tool, needle tool, and oval cutter. 
Put the oval cutter aside, because we're going to get handsy and make dimensional skulls first. 

Take 1/4 of your clay block (it's pre-scored, so just cut along that indentation) and soften it up. You can work it with your hands until it's squishy, or if you have a clay roller you can use that. Once your clay is good and soft, roll it into a ball.


Then kind of pinch one end to make an egg-shape. Lay that down and cut it in half lengthwise. 


Now you have two skulls! One to wear, one to share. 
Flip them over and roll the cut edge towards the back.


Once your edges are rolled, flip it back over and kind of smoosh it with your thumb to flatten the front a bit.

Smoosh!
 Below I have drawn a rough sketch of facial dimensions. The eye sockets will be about 1/3 from the top of the skull, and the mouth about 1/3 from the bottom. Don't get crazy with measuring though, you can just eyeball (ha!) where you want your eyeballs.


Use the back end of your needle tool to press 2 indentations where the eye sockets would go.
Use the needle part of your tool to make a mouth.


And again, use your needle tool to make teeth lines. 4-6 lines work best--we're not going for anatomical authenticity here.


Now look at your skull--how cute! If you like you can smooth out any rough edges around the eyeballs.


Get out your jump rings--the 10 mm ones.


Take one and smoosh it down into the top of the skull.


Use your needle tool to close the hole made by the bottom of the ring. This will make sure that you don't lose your head later.


Admire your handiwork. Set him aside to wait his turn in the oven. Go ahead and make your second skull. I'll wait....

Okay? 
Now, Sugar Skull method number 2! (or Numero 2, if you prefer)

Take about half the amount of clay that you used last time, and roll it out to about the width of a nickle.


Get out your oval cutter and cut an oval. Use the cutter, slightly staggered to cut away the bottom portions of the oval. I've found that having a chin segment that's thumb-width is about right. Also, I had to do this at least 5 times before I figured out where to cut. It's OK if it takes a few tries.


Use your needle tool like you did before to make eye sockets and teeth.


Roll out your second color of clay to the same width.


Play around with placement of your skull. I eventually settled on a tombstone-like shape.


I used my cutting blade to cut that out. DON'T SQUISH YOUR SKULL ON THERE YET!


Pull the skull off and place it to the side. Get out your floral stamps and randomly stamp on your dark clay. 

Now flip over your stamped clay and get out your pin back.


 Place the pin back on the clay, opened.


Use scraps of leftover clay to hold it in place. 
Make sure you can open and close the pin!


Now flip it back over and put your skull back on the front. Awww.


Bake your skulls in a 275 degree oven for 40 minutes. 
Let them cool after baking.
Have a snack.

Get out your paints, paint brush, permanent pen, paper towel.


First things first, paint all your eye sockets black. Also, paint the teeth lines black.


NOSES! They are just tiny upside-down heart shapes. The easiest way to draw them is to flip the skulls upside down and draw the hearts right side up.Paint inside of the noses black, too.


Take your permanent pen and DRAW*. It's traditional to do floral shapes around the eyes. But you do what you feel moved to do.


Next, use your pen to connect all of your vertical lines and make teeth. The tops of teeth are rounded, not square, so use your lower-case-m writing skills here.


Same thing for the bottom teeth. Cursive-lowercase-w writing skills. (Do they even teach cursive anymore?)
Repeat for all your skulls, regardless of size.


Get out your paints and paint away. Paint your flower petals, paint lines around your teeths. Paint hearts and stars and spiderwebs. Paint all the Lucky Charms shapes on there!


Do some scroll work swirly stuff. Paint lines or dots around the edges.


With these two techniques, you can go skull crazy. And I heartily recommend that you do! 


* I have found that permanent pen takes a while to dry. If it smears, take a damp paper towel and wipe it off. Also, it's probably a good idea to seal your paint with a matte sealer after it's completely dry--like 24 hours later. 

Monday, October 22, 2012

Quote of the Week


I don't know about you, but I need this reminder right now. Otherwise I'll just wallow in my disappointment--I'm prone to wallowing. (Come over and we can wallow together, with a giant batch of chocolate stuff)
Right now I'm supposed to be spending hours making art and enjoying the company of a good friend, but instead, her car broke down and she isn't here. And I'm bummed.

It's time to focus on the good:

She is healthy and safe and her car let her pull off the highway before it quit completely.
I have some unexpected free time in my week.
My kids have thus far avoided catching the cold that is going around.
I got a gig teaching private art lessons, starting in November.
I get to see my itty bitty baby niece this weekend.
This week's tutorials are AWESOME. 

See? I feel better already. 


Friday, October 19, 2012

Well looky here!


How do?!
Today is a very good day for me indeed! My first article has gone live over here! Now you can find twice the tutorial fun! The above is an example of an Ancestor Banner--the kind that you can use for your Dia de Los Muertos or Samhain celebrations. 

I am very excited to be a columnist for The Pagan Village. The tutorials I'll be posting over there will be seasonally inspired and Sabbat-related (The solstices, equinoxes, and in-betweens). 

We love Halloween/Samhain/Dia de Los Muertos around here. We wrap up all of the various traditions into one big celebration of life, our loved ones, and the fun that comes from dressing up and visiting with our neighbors.

What's your favorite holiday?

Wednesday, October 17, 2012

Hump day, now with a creamy art filling!


Hello friends!
I am plotting and planning many a thing for the upcoming Dia de Los Muertos celebration. I'm not Latina (sadly. I think I'd be good at it), but I am pagan and we celebrate our ancestors in much the same way on October 31. I love the colors and celebratory nature of the Dia de Los Muertos festival, and this year I am making a whole mess of projects to celebrate. Tune in next week for a tutorial or two!

There's some great info on Dia de Los Muertos here.

And some great info on the holiday of Samhain here.


Monday, October 15, 2012

Imagine


This is one of my all-time favorite quotes from Albert Einstein. I love that one of the most brilliant scientific minds of the last century understood that without the power to imagine we wouldn't have made it out of the caves, across oceans, and into the stars.

Exercise your imagination this week! As we draw nearer to Halloween we get unspoken permission to break out of the roles that we have carved for ourselves and try on new ones. Use these next few weeks to see where else you can apply your creative spirit.


Friday, October 12, 2012

Old McPlummy had a farm!


Hey there!
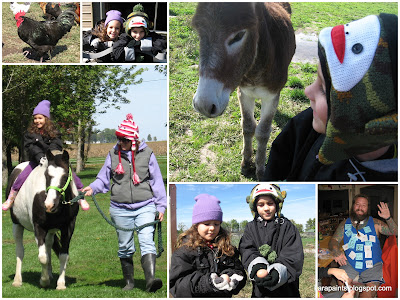
Last weekend we were visiting our friends on their e-i-e-i-o homestead. It was a grand time. Miss Patti took the kids out for farm chores and bareback horse rides (thrilling for all), and Mr Bob let the kids stick post-its all over him and call him "Billboard Bob". He's the best--for a while (when the kids were much smaller) he was Nanny Bob, too. The weekend was the perfect mix of great friends, good food, and fresh air.
We came back all unwound and relaxed.
This weekend we'll swing back into the crazy pace that is our lives. Tune in next week for more quote-able quotes, tutorials, and photos.
Enjoy your weekends, dears!

Tuesday, October 09, 2012

Upcycled Luminaries Tutorial


I don't know about you, but I love candles. I also love not burning down the house while I'm enjoying the warm glow of firelight. Over the years I have amassed quite the collection of glass votive-candle holders, but I wouldn't want to put them outside on a very cold night. I am planning on making a whole lot of these luminary cans and placing them along my sidewalk on the colder holidays.

Since they're made from cans (the small one was pumpkin, the big one was tomatoes) when I get tired of them I can put them in the recycle bin and make new ones! 

Are you ready to get crafty? Once your can is prepped, this takes no time at all. I made both of these in twenty minutes.


Supplies:
Cans from canned goods
A large nail (mine was 2 1/2 inches)
A hammer
A pattern (got mine for free from Martha Stewart. Her website has all kinds of free templates)
Tape to hold the pattern on.

Step one: fill your can with water, leaving a 1/2 inch unfilled at the top. Stick that in the freezer, preferably overnight. I've been freezing the cans as I use them.

Step two: tape your template to your can.

Check out my homemade potholders...pretty sweet, right?


Step three: use your hammer to drive the nail into each one of the dots on your pattern. It shouldn't take a whole lot of effort. Work quickly, as the ice melts the paper gets wet and tends to slide which can lead to some funky-looking patterns.


Step four: Put some candles inside, light them up and watch the show.

Pretty easy, right? The variations on this one are endless.


Thursday, October 04, 2012

Today Photo Friday is Bonus Tutorial Day!

Oh you lucky ducks! Thursday was an especially productive day for me and you get the benefits! 
Do you remember that I told you to hang on to your bats? Well here they are going to good use!

Get your paper mache bats and a few other supplies:


A 9" wreath (thank you dollar store)
Ribbon: in black, white, and orange--that's the same ribbon from the flanner tutorial, and the leftover leaves, too. My house is on it's way to being matchy-matchy.
Leaves: the fake ones with the wired stem. Three of them.
Black paint and a paintbrush.
Florist wire and wire snips
White glue
Scissors


Take your orange ribbon and start to wrap it around the wreath form. Wrap on a diagonal.

Place a line of white glue on the wreath and on the part of the ribbon that will be hidden by the overlap.


Keep wrapping on a diagonal so that you cover the wreath form just a bit with each wrap.

Leave a five inch (or so) tail on your ribbon when you get back to the beginning.


Loosen your last wrap-around just enough to slide the tail through to the other side.


Once you get it through, pull it taut. Then straighten out the wrapped portions so that none of the wreathe form is showing.


This will be the top of your wreath, where we'll attach the ribbon for hanging later.


 Next you'll need to paint your bats. Black is preferable. Set them aside to dry.
(If you don't have paper mache bats, you can cut bat shapes out of black card stock.


Next get out your leaves. Lay one over the other like so:


Then twist the wired stems together. Place the third leaf on top of the others and twist all three stems together.


Bend the stems so that the leaves mirror the shape of the wreath. Then fold the stems towards the back of the leaves to make a U shape.


Pretend your wreath is a clock. Between 5 and 6 tuck the U under the wrapped ribbon--you'll need to wiggle the stems and lift the edges of the ribbon to get it in there. 


Then take some florist wire (about 6 inches) and wrap it around the bottom leaf (right where the stem begins) and the wreath.


Flip the wreath over and twist the wire ends until the loop is snug, then fold your wire tail up against the wreath.


Now you could put a hanging ribbon at the top and stop right here. It's a nice autumnal wreath.


Or you could get out some thin ribbon and make a wreath for your pagan friends


Or you could take 8 inches of florist wire, bend it into a U and duct tape to the back of your bats.


And then wire your bats onto the wreath.


Make sure you fold up those loose wire ends at the back.


Cute, right? Not quite finished though. It needs...something else.....


Ribbon! Get your black ribbon , about 14 inches, fold it in half.


Then loopty-swoop it onto your wreath. Or just tie it.


Next: more black ribbon. 18 inches this time. Make a bow. 


Loop 6 inches of florist wire through the knot of your bow.


Affix bow to wreath like you did with the bats. Over top of that first piece of black ribbon.


Next! Ribbon for hanging! Take a length of white ribbon (about 24 inches). Wrap it three times around the top of the wreath. Tie a knot. Gather your ends and tie another knot--or a bow--to act as the hanging point.


Display your bat-tastic wreath on your front door. Once Halloween is past, you can un-wire the bats and the black ribbon and put on pine cones or corn husks instead.


I hope you enjoyed your bonus tutorial! 
Have a great weekend!