Here we are! Our final tutorial for this watercolor workshop. Sad panda! But there will be future tutorials and future workshops, so fret not my friends!
Today, we are going to make a painting of a cardinal on a branch. You can frame it, pin it on a cork board, fold it in half and turn it into a card. Or a book cover!
We'll need various supplies, so get them out and ready!
Watercolor paper (for real, because it's going to be messy) 5"x7"
Pencil with eraser
Paint
Brushes (large flat, medium round, small round)
Water (2 jars--one for clean water & one for rinse water)
Painter's tape
Stamps (a floral motif works best for this one) & stamp base block
Dye ink pad in a dark green
Towels: paper & terrycloth (I use the terrycloth to absorb extra water from my brushes)
First, tape down your paper making a 1/2" border around the edges. Then sketch a cardinal on the right 1/3 of the paper, and give him a branch to sit on. Tutorial on drawing a cardinal here.
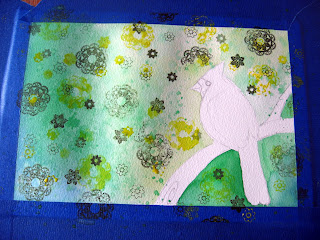
Once you have your cardinal done to your satisfaction, take your flat brush and dip it in the clean water. Paint with water from the outside edges right up to the cardinal and branch. KEEP YOUR BIRD and BRANCH DRY!
Next, take your medium round brush and load up on the darkest green you've got. Start in the bottom left corner and paint upwards until you run out of pigment. If you want it darker, load up your brush again and start in the same corner.
Then rinse your brush and load up on medium green. Start at the top left corner and work diagonally down the page. Overlap your colors!
Rinse your brush again and dip into your light green. Start at the branch and work up towards the medium green. Overlap your colors!
Work around the front of your bird, and then start under the branch with the medium green.
Add dark green to the bottom right corner, and light green to the top right corner and down to the branch.
Take your paper towel and fold it into a triangle that will cover your bird. Place the paper towel over the bird. Take your medium round brush, load it full of medium green and spatter all over the page.
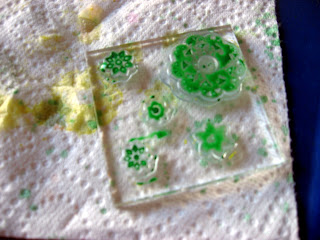
While this is still damp, take your stamps and load them up with ink.
Then stamp all over the page. Add more ink as needed.
Next, paint on your stamp with yellow. And stamp all over the page again. Add more paint as needed.
Last time with the stamp! Paint it medium green and stamp away!
Load up your medium round brush with water and spatter the whole thing with water.
Blot up the water with a paper towel. (I have been using the same paper towel the whole time)
Next we'll do the branch. Start with the medium round brush and do a very pale wash of yellow. How do you do a pale wash? More water, less paint. You can paint the branch with water first and then add the yellow. You can paint the branch with yellow and then add more water. You can do either technique and then blot the whole thing with a paper towel. Just make sure it's pale yellow.
With your branch still damp, take your round brush and dip it in the brown paint. paint along the underside of the branch. Then tease the paint up with your brush. I like to use up all of the paint, then dip my brush in water to clean it, wipe in on the towel so it's not sopping wet, and then go back into the brown and push it around.
Once you've done the bottom of the branch, do the top--with slightly less paint. Make sure to leave a bit of the pale yellow exposed.
Finally, the bird!Using your small round brush, paint the beak bright yellow.
Directly over that, paint with orange.
Use your paper towel to lightly blot up the paint.
Next, fill in the body of the bird with clean water.Leave the face mask dry--it'll be black later. Use your medium round brush and red-orange paint to lay down a wash over the whole body.
Starting to look like a cardinal, yeah?
Take your small round brush and load it full of red. Paint along the front outline of the bird.
Paint along the wing and the tail feathers.Where the two wings meet at the bottom of the body, make a "w".
Add some lines to suggest flight feathers.Add red under the wings to create a shadow. Add red to the back of the bird and to his head.Add extra red around the face and chest.
Go over the body again with the red-orange. Leave a small crescent on the wing and on the belly--this suggests where the light is coming from.
Next, take your small round brush and using your red-purple, paint under the wings and the tail feathers. Using orange, outline the beak and the beak-line (where it would open).
Wait five minutes or so--go to the bathroom, grab a quick snack. You want the head of the bird to be a little bit dry before you paint the face mask. Rinse your brush and load up on black. Paint the face mask.
For this next part, move super slow. Paint the eyeball, starting from the back. leave a thin crescent of unpainted paper at the front. (Or wait till the whole thing is dry and draw it on with a gel pen)
Once it's dry, pull your tape up and admire your finished work!
Well done, you! And way to power through the whole workshop!
If you have any questions, please email me! KaraCrafts(at)gmail(dot)com.


No comments:
Post a Comment