I was up at 6 this morning, having woken from a dream that I couldn't navigate my way out of while still sleeping.
The early morning dark and quiet were lovely for uninterrupted thinking. I didn't RESOLVE anything, but came up with a few more pertinent questions about what I am doing with my art, and what the ultimate goal should be.
I got to watch the sun rise over the woods--lavender to rose to an overcast grey.
The question that I am grappling with at this moment: HOW do I balance the fine art and the tattooing? Will I have to make a choice between the two? Which would I choose?

Find me now at KaraPaints dot com!
Wednesday, January 25, 2012
Friday, January 20, 2012
Tiny Wolf Polymer Clay Tutorial

Hello! It is snowing like crazy here, and when it gets snowy I either craft or bake. My sister in law left me a mess of brownies earlier this week, so crafting won out.
How'd you like to make a tiny wolf? And later you can paint your index finger to look like Red Riding Hood and make an evening of it.

As per usual, before we get crafty, we get set up!
You will need:
Polymer Clay (black, white, silver, beige, and translucent)
Wipes (to keep your hands or rolling machine clean)
Tools: A needle tool (or a needle)
A sculpting tool (and I haven't found anything that substitutes really well, but you could try a bamboo skewer)
A cutting blade (an exacto, or a kitchen knife)
Rolling machine (this is for mixing your colors. You can use your hands, but if you use a 50% off coupon you can get a rolling machine for $14. And if you are going to be working with Polymer Clay it's worth every penny)
Ready?
Here we go!
Take equal amounts of beige & translucent and mix them up really well. No streaks or lines! This will be your face color. (Sorry I don't have a photo, I was on the phone for this part and forgot!) Set that aside. Wipe down your hands & machine.

Take a hunk of white, half as much black and half again as much silver. Run it through the rolling machine, bending it over until it's mostly mixed. Then set it down on your work surface and roll it into a log that is slightly thicker than your thumb.

Slice off a 2 inch-ish section, and a half inch section.

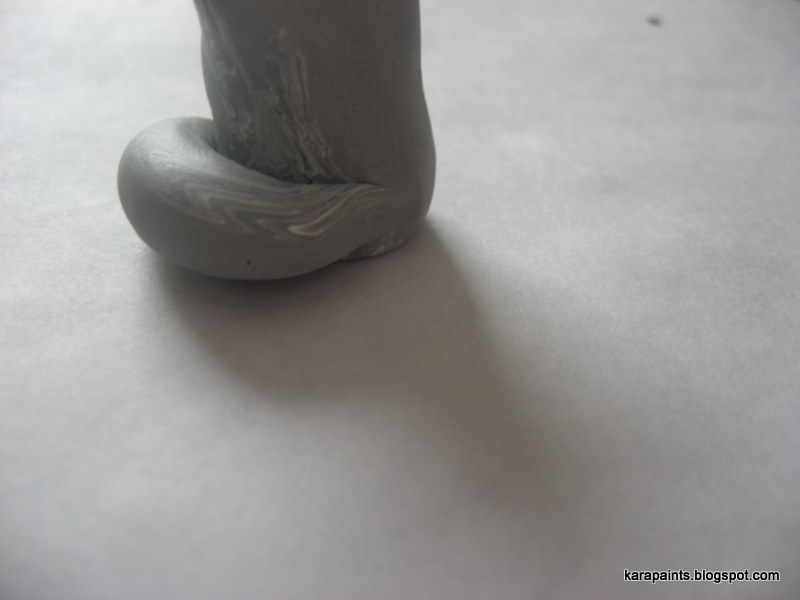
Stand the large roll up on it's end and kind of squish it down so it'll stand on it's own when you take your hand away. I like to smooth out that bottom edge with my fingers as well. Then take your sculpting tool and put it in the middle of the of the top. Press lightly & roll back and forth to create two peaks and a valley.

Pinch the peaks into pointy ear shapes.

Use your sculpting tool to make ear canals. I like to use the rounded end of the tool to widen the base of the canals to give it that canine cupped-ear look.

Take the smaller section that you cut off and roll it on your work surface to make it round. Roll the ends into 2 chubby points.

Curl it into a crescent.
Attach it to the back of your wolf and kind of smoosh it to keep it in place. (And wipe down your hands)

Next take a tiny bit of your translucent/beige mix and make it into a tiny oval. How much you use is up to you. Different faces sizes will give different impressions (old versus young, surprised versus suspicious) Play around with it and decide what you like best.

Make an indent in the body to place the clay into.
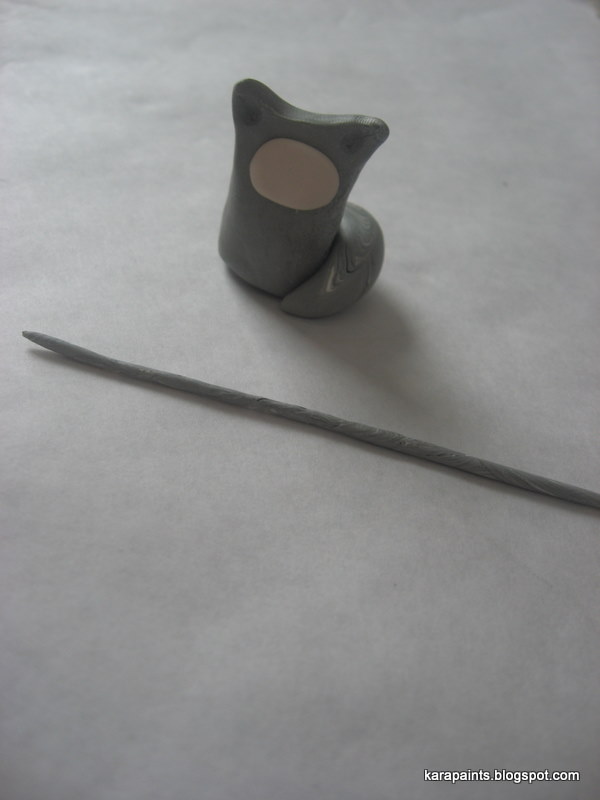
Place the face onto your wolf's body.(Your Wolf's Body would be an excellent band name) Roll out a thin rope of grey.

Wrap the thin rope around the face. At this point you can add details--use your needle tool to create lines on the tail to resemble fur, make a flower out of clay and put it behind the ear, play around & have fun.
Then bake according to package directions.
You can use this technique to make all kinds of animals, use an orangey-red for foxes or change up the tail and make the ears more pointy for cats.
How cute would these guys be in a fairy garden?!
Wednesday, January 11, 2012
A peek inside the Sketchbook

WATCH FOBS!
My dad is a reenactor. He's done revolutionary war, civil war, and now he's on the war of 1812.
He sent me a whole mess of photos of watch fobs in the hopes that I will craft one for him.
I have sketched out all the photos. This is step one.
Step two is to let the images percolate in my brain.
Step three is to sit down with some clay and fiddle about for a bit.
Tuesday, January 03, 2012
First project of 2012

(The circle in the front is a quarter, for scale)
I sat down on New Year's day with my supplies and no real ideas in my head.
I tried making a mermaid, but I wasn't happy with the neck to head transition.
I tried making a flower, but the finished project filled me with "enh ".
As I was working, I was listening to a podcast (This American Life) and something in the story made me think of those Russian nesting dolls; I can NEVER remember the name of those!
The sky was filled with the heavy grey clouds that usually proceed snow, and I picked up the pink clay and out came the three little beauties in the middle.
I was on a roll! I still had pink left, so I mixed it with gold and brown and made the perfect fox fur color.
And if you didn't know already I love foxes & owls together ; they just make sense as a pair.
For the past 2 days I have been reorganizing my studio space in a way that makes sense for what mediums I use and how I like to work. This has slowed down my ability to actually MAKE art, but I feel I will be truly happy now that I have a system in place. And zones! I have zones!
Subscribe to:
Posts (Atom)