Hello!
As promised, we're going to take all of those wet-on-dry techniques and make ourselves a picture. It's a summer-cabins-in-the-woods-at-night kind of picture.
Get your supplies assembled!
Watercolor Paper (5"x7")--I used 300lb cold press
Paint--I'm using Prang paints
2 brushes--round #9, round #4
2 containers of water--one to rinse, one to dip
Painter's tape
Scissors
Sponges--natural & synthetic
Spray bottle
Terry cloth towel
Paper towel
Kosher salt
Permanent fine-tipped pen
Step one: Tape your paper down to the table. This will give you a nice border when we're done, and holds the paper in place later--we're going to get a little rough.
Step two: Cut 3 rectangles and 3 triangles out of your tape. Assemble them to make houses and affix to your paper
Step three: Lay down a wash of Green 39 (blue-green) for your grass. Let dry.
Step four: lay down a wash of Blue 35 (Cerulean) for your sky. Let dry.
Step five: Lay down a wash of blue over your first wash of blue 35, and a wash of green over your first wash of green 39. Let those dry.
Step six: Get out your natural sponge and dip it in your water--squeeze out the water so the sponge is damp. Spray water onto your green 39 paint. Dip the sponge in the wet paint. Dab along where the sky and ground meet. Paint over the houses! This way the sponge-trees make a more natural tree line. Let dry.
Step seven: Natural sponge again! Use your spray bottle to dampen the green paint; dip your DRY natural sponge in it. Go over the dark green. Let dry. Rinse out your sponge and set aside to dry.
Step eight: Synthetic sponge time! Spray down your green paint and dip your DRY sponge in the paint. Dab the painty-sponge along the green grass to add texture. Rinse out your sponge.
Step nine: Take your damp sponge and rub away some of the blue paint at the top of the picture. Then, spray lightly with water. (And rinse out your sponge, set aside to dry)
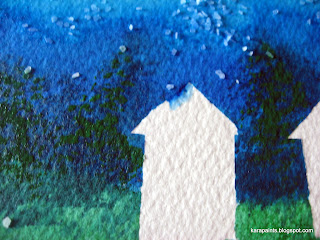
Step ten: Sprinkle kosher salt onto the sky. Let dry.
Step eleven: Peel up the house-shaped tape.You'll notice the middle house had some paint seep beneath the tape. No worries!
If this happens, take your small round brush and get it wet. Then rub along the edge with the excess paint.
The paint will start to bleed.
Dab up the wet paint with a paper towel.
Step twelve: Paint the houses with a wash of purple. Let dry.
Step thirteen: Use blue violet and your small round brush to paint along the roof line, and add doors and windows. Let dry.
Step fourteen: Add details with a permanent Fine-tipped pen, and peel up your tape. Scrape off the kosher salt (I usually do this over the sink).
Congrats! You have just completed your very own watercolor painting!
Some thoughts on working with the wet-on-dry technique:
It's all about LAYERS. I find that the process can be tedious--especially all of that waiting for things to dry. I try to work under a ceiling fan and with the windows open. When that's not feasible (Midwest winter is not the time for open windows!) I use a hair dryer on cool on the lowest setting--and make slow back and forth motions so that I'm not moving the paint around.
Next time: Wet-on-wet! My personal favorite--it's a little looser, and slightly unpredictable, but it can give you some very pretty results.


No comments:
Post a Comment