Does it snow in Casablanca? I have no idea. If you know, please enlighten me. These jars were inspired by a whole bunch of things: Moroccan lanterns, painting on glass, and Peaches' gilded jam jars.
There are a few important lessons that I learned doing this project.
First: SIMPLE DESIGNS ARE YOUR FRIEND. Keeping it simple really is the key to success here. Gold leaf is super thin and will adhere to things via the magic of static. Which is why the front lantern looks great and the back looks (to quote my five year old) like a haunted house.
Second: Mixing food color and ModPodge doesn't give you super-awesome-vibrant colors. I'm going to have to actually spring for actual glass paint if I want jewel tones (so much for being thrifty)
Third: Gold leaf sealer is stinky. Open a window.
Got all that? Ready to make some gorgeous candle holders?
Supplies
A clean, empty jar
Paint brushes (a big flat one, and a soft one)
A bowl for mixing glass paint
ModPodge
Food coloring
Rinse-water jar (I add a drop of dish soap to keep the ModPodge from settling in the brush)
Gold leaf, gold leaf adhesive, gold leaf sealer (Got mine at Michael's)
Step one: Mix up your glass paint. I went with green because I like green and gold together. I used Lucy's recipe of 1tsp ModPodge, 1.5 tsp water, 3 drops of food coloring.
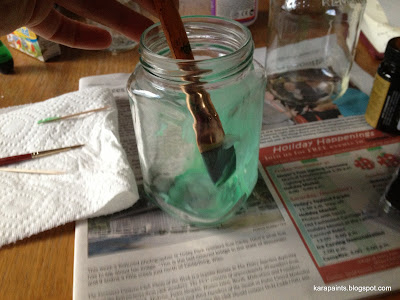
Step two: Paint the inside of your jar.
Step three: Set aside to dry. I did mine upside down because I didn't want a big pile of glue & food color at the bottom of my jar. How great is that green? I loved it. Sadly, it was not to stay.
Step Four: While you wait for your paint to dry, Google Image Search Moroccan Lanterns, and come up with some pattern ideas (Or just use mine). On the haunted house lantern, I was going for a design like the large one on the bottom of the right page.
Step five: Paint your patterns on the outside of the jar with gold leaf adhesive. REMEMBER: Simple works best! Let the adhesive dry according to the directions on the bottle.
Step six: Get out a sheet of gold leaf. (I like the stuff that's already stuck on a paper backing. It's easier to handle)

Step seven: Apply the gold leaf to your jar. Rub the paper side to make sure the gold is sticking.
Tip: Use your soft brush to smooth out air bubbles and flatten out fly-away pieces of gold.
Step Eight: Seal your gold leaf according to the directions on the bottle.
This is what they will look like without a light inside. More sea-glass-meets-Casablanca, but still pretty.
Have fun with it. Gold leaf is great stuff. It is an easy way to add bling to just about anything, it's inexpensive, and it makes candle light look a million times better.


4 comments:
I love the idea! I don't know that I'm brave enough to do it though...my last few attempts at gold leafing did not go well! Great idea Kara, love the design sketches too!
Love the idea Kara! Fab as usual! Don't know that I'm brave enough to attemp gold leafing again...you were not lying when you talked about static and its attraction to that stuff!
Thanks!
Very nice. Gives me all kinds of ideas
Post a Comment