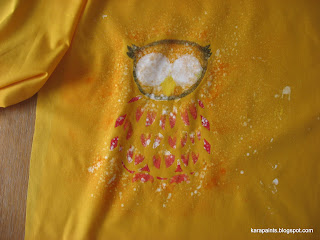
You guys know about freezer paper stencils, right? They are the BEST for customizing your wardrobe/accessories. I wanted to bring a little something into the house for Fall--something that would last September to November. Don't get me wrong; we LOVE Halloween and absolutely decorate inside and out for it, but August seems too soon for that, and Thanksgiving seems too late. I have always loved birds, and lately my mind has turned to owls (you'll see why later). I decided to make owl pillowcases for some throw pillows. And you can too!
Supplies:
Paper
Felt-tipped pen
Exacto blade
Scissors
Freezer paper (found in the aisle with the aluminum foil and cling wrap)
Fabric of your choice, or old pillowcases
Iron and ironing board
Fabric paint (soft body in red, white, and yellow; spray in black, orange, and white; and puff paint in white and black)
Sponge brushes for paint
First you'll need a drawing of an owl (or some owl clip art). Blow it up to about 8 inches tall.
Then get your freezer paper and pen out. Freezer paper has two sides: paper and a plastic-coated side. You will be drawing on the paper side. Freezer paper is wonderfully translucent, so tracing is easy peasy!
Here's a handy tip: BEFORE you trace anything, make 2 small "x" at the top of your paper
Then, when you put your design under your freezer paper, FIRST mark where those two "x" are. That way if your paper slips (say, you get up to make someone a sandwich and come back to find that small hands have moved your papers around) all you have to do is line up the two "x" and continue tracing.
Once your design has been traced, cut out THE INSIDES FIRST with your exacto blade. This is easier if your blade is sharp. And remember to cut on top of newspapers or a cutting mat.
After you have the insides all cut out, use your scissors to cut on the outer edge. Then set your iron to LOW and place your stencil PLASTIC SIDE DOWN on your fabric. Press for 15-20 seconds. The plastic will adhere to the fabric.
Then get out your paints! I use Tulip brand and I Love to Create brand.
Try painting with the soft body paints and then spraying over top, or spray first and then paint. Let dry according to your manufacturer's directions.
Next, take the face area of the original stencil, place it over your drawing and trace where the eyes and beak will go. Cut those out with your exacto.
Iron the face stencil onto your owl.
The owl on the left was paint and then spray paint, the owl on the right was spray paint and then fabric paint.
Paint the eyes white and the beaks yellow. Again, let them dry according to the package directions.
Once they are dry, peel up the stencil paper--it comes right off. Tumble dry on high for 15 minutes to heat-set the paint.
Next, I got out my puff paint in black and white, and used that to trace over where the stencils had been. Lastly, I added some details with a Sharpie pen.
Two pillows to welcome the Autumnal season into the house.
What are your favorite ways to bring Fall indoors?


1 comment:
Love the "little hands have moved" part. Very cute project.. I like leaves to transition from summer into fall. I am excited to see the first ones fall, and with the drought they fall early.
Mom
Post a Comment